Editing banner content
The wording on your banner sets the tone visitors get from your business. One Privacy ships with a friendly default, and every line is editable so you can match your voice.
Open the content editor
In your project, open Customization. Click the Content card. A modal opens listing every language your banner has, each with an Edit button. Click Edit next to a language to open the content fields for that language.
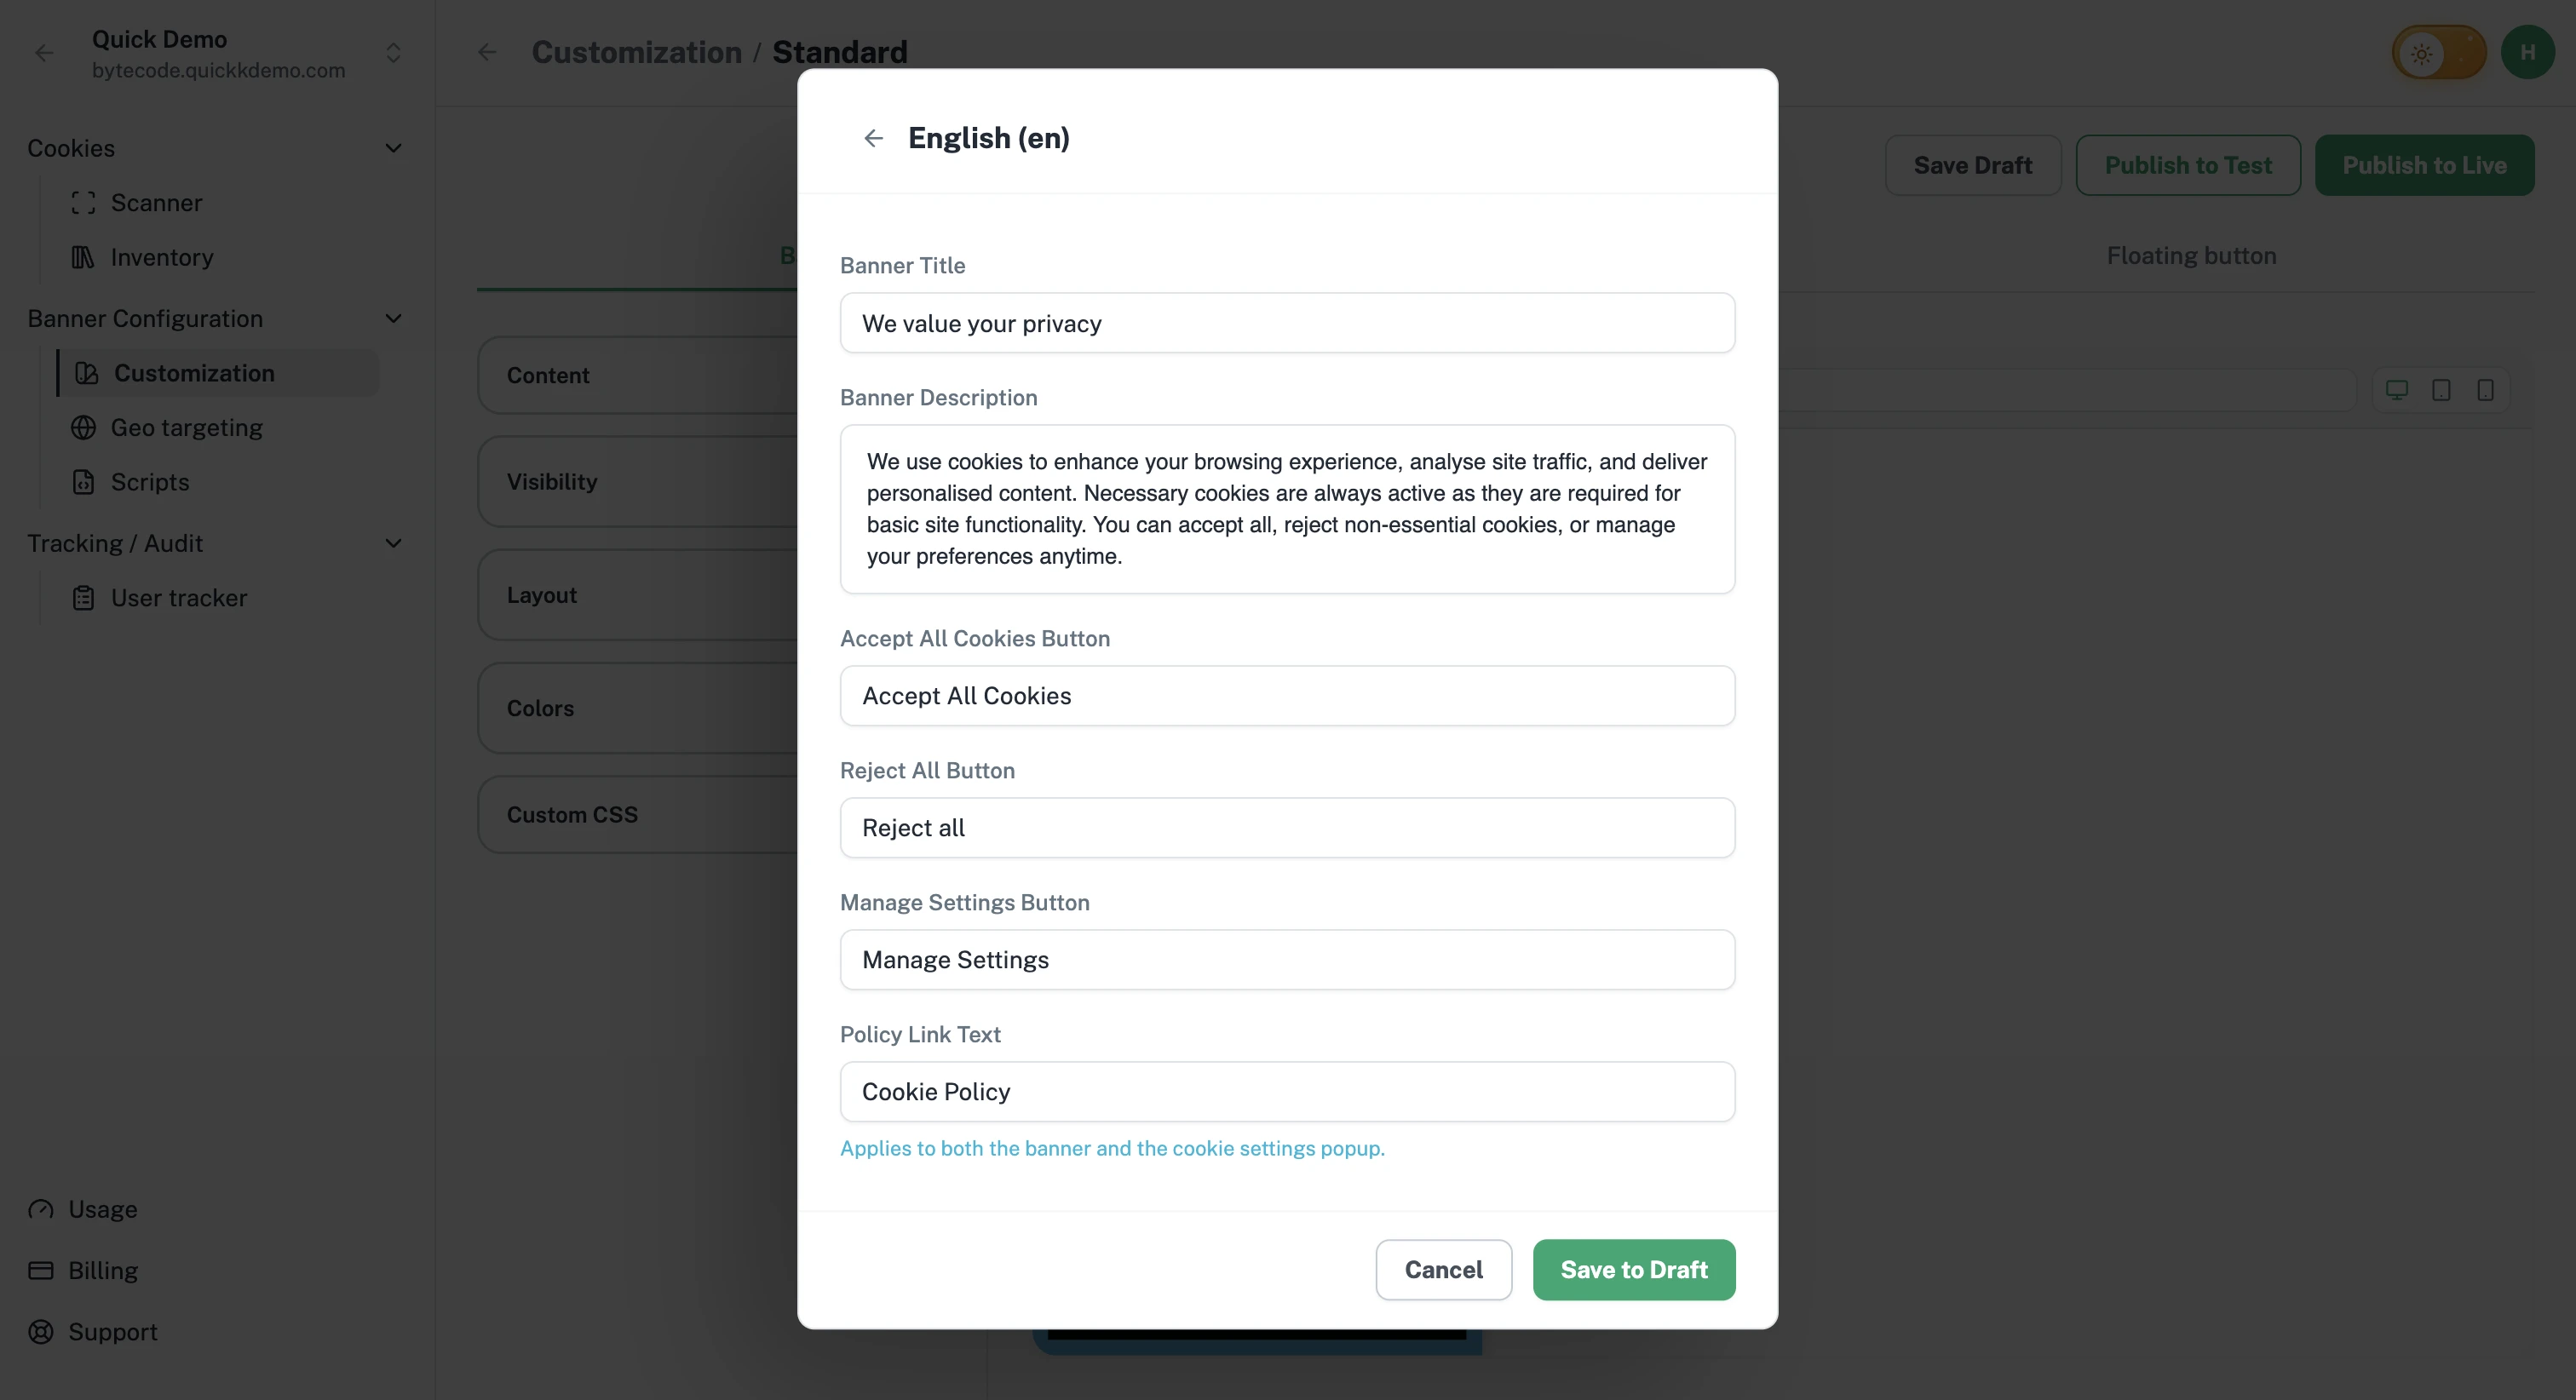
What you can edit
Banner Title. The heading on the banner. Default: "We value your privacy".
Banner Description. The main paragraph that explains why you use cookies. The default reads:
We use cookies to enhance your browsing experience, analyse site traffic, and deliver personalised content. Necessary cookies are always active as they are required for basic site functionality. You can accept all, reject non-essential cookies, or manage your preferences anytime.
The button labels. The text on the Accept All, Reject All, and Manage Settings buttons.
Policy Link Text and Policy Link URL. The label and destination of the cookie policy link on the banner. Default text: "Cookie Policy".
Some banner types have their own fields instead of the three standard buttons: an Acknowledgment Only banner has an Okay Button field, and a Do Not Sell banner has a Do Not Sell Button field.
Suggested approach
Keep it short and direct. Visitors decide in seconds. A long paragraph reduces consent rates.
Match your voice. If your website is conversational, the banner should be too. If your business is formal, keep the banner formal.
Be honest. Don't bury what your cookies do behind vague phrases. Plain language builds more trust than corporate-speak.
Mention specific use cases. Saying "we use analytics to make checkout faster" lands better than "we use cookies for performance".
Translations
If your visitors speak multiple languages, you can add language-specific versions of every field. See Multilingual banners.
Cookie Settings popup content
The popup behind Manage Settings has a much longer list of content fields (titles, descriptions, and per-category text). See Cookie settings popup.